Create or Edit Loyalty Program
Quick overview in the video, for more details see below.
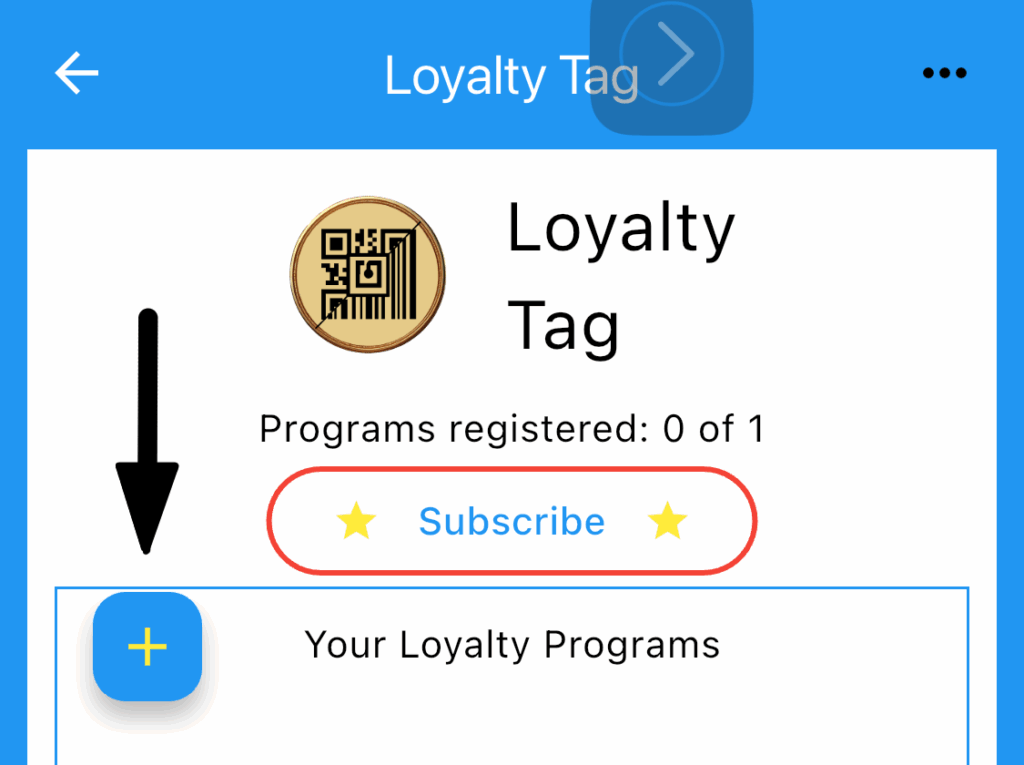
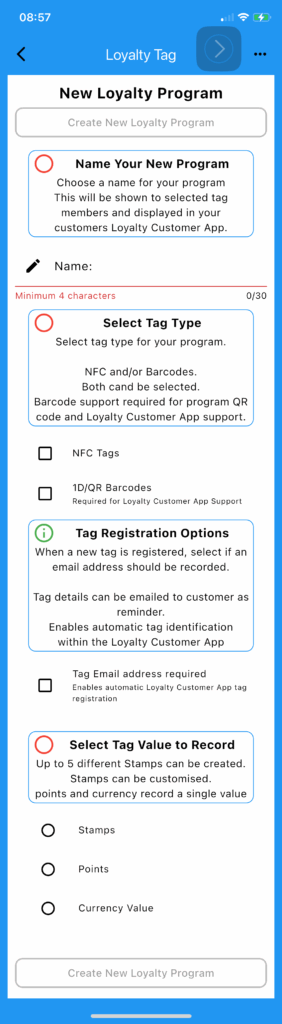
create a new Loyalty Program
- Create a new Program.
From the program selection screen, tap the ‘Create a new Program’ button - Name your Program.
Make it identifiable as it will be the name displayed to users of the Loyalty Customer app. - Select your Tag types.
Choose to enable the type of tags to be enabled. Both NFC and QR/Barcode tags can be used. If you want to use Barcodes, the Loyalty Customer App as a Loyalty Tag or use a QR joining code with the Loyalty Customer App, QR/Barcode must be enabled. - Tag Email Address Required.
Select if Customer Email Addresses should be required when registering a new tag.
If enabled, tags registered using the Loyalty Tag app will required an email address. Customers registering using Loyalty Customer will have already registered their email address. Ensure you notify customer and comply with all required GDPR laws as appropriate. - Select reward value type.
Programs can be set to collect:
Stamps: Up to 5 different stamp
Points: Simple and direct, single value
Currency Value: Like points, but displayed as a currency value.
Only one can be chosen. - HIT THE BUTTON!!!!

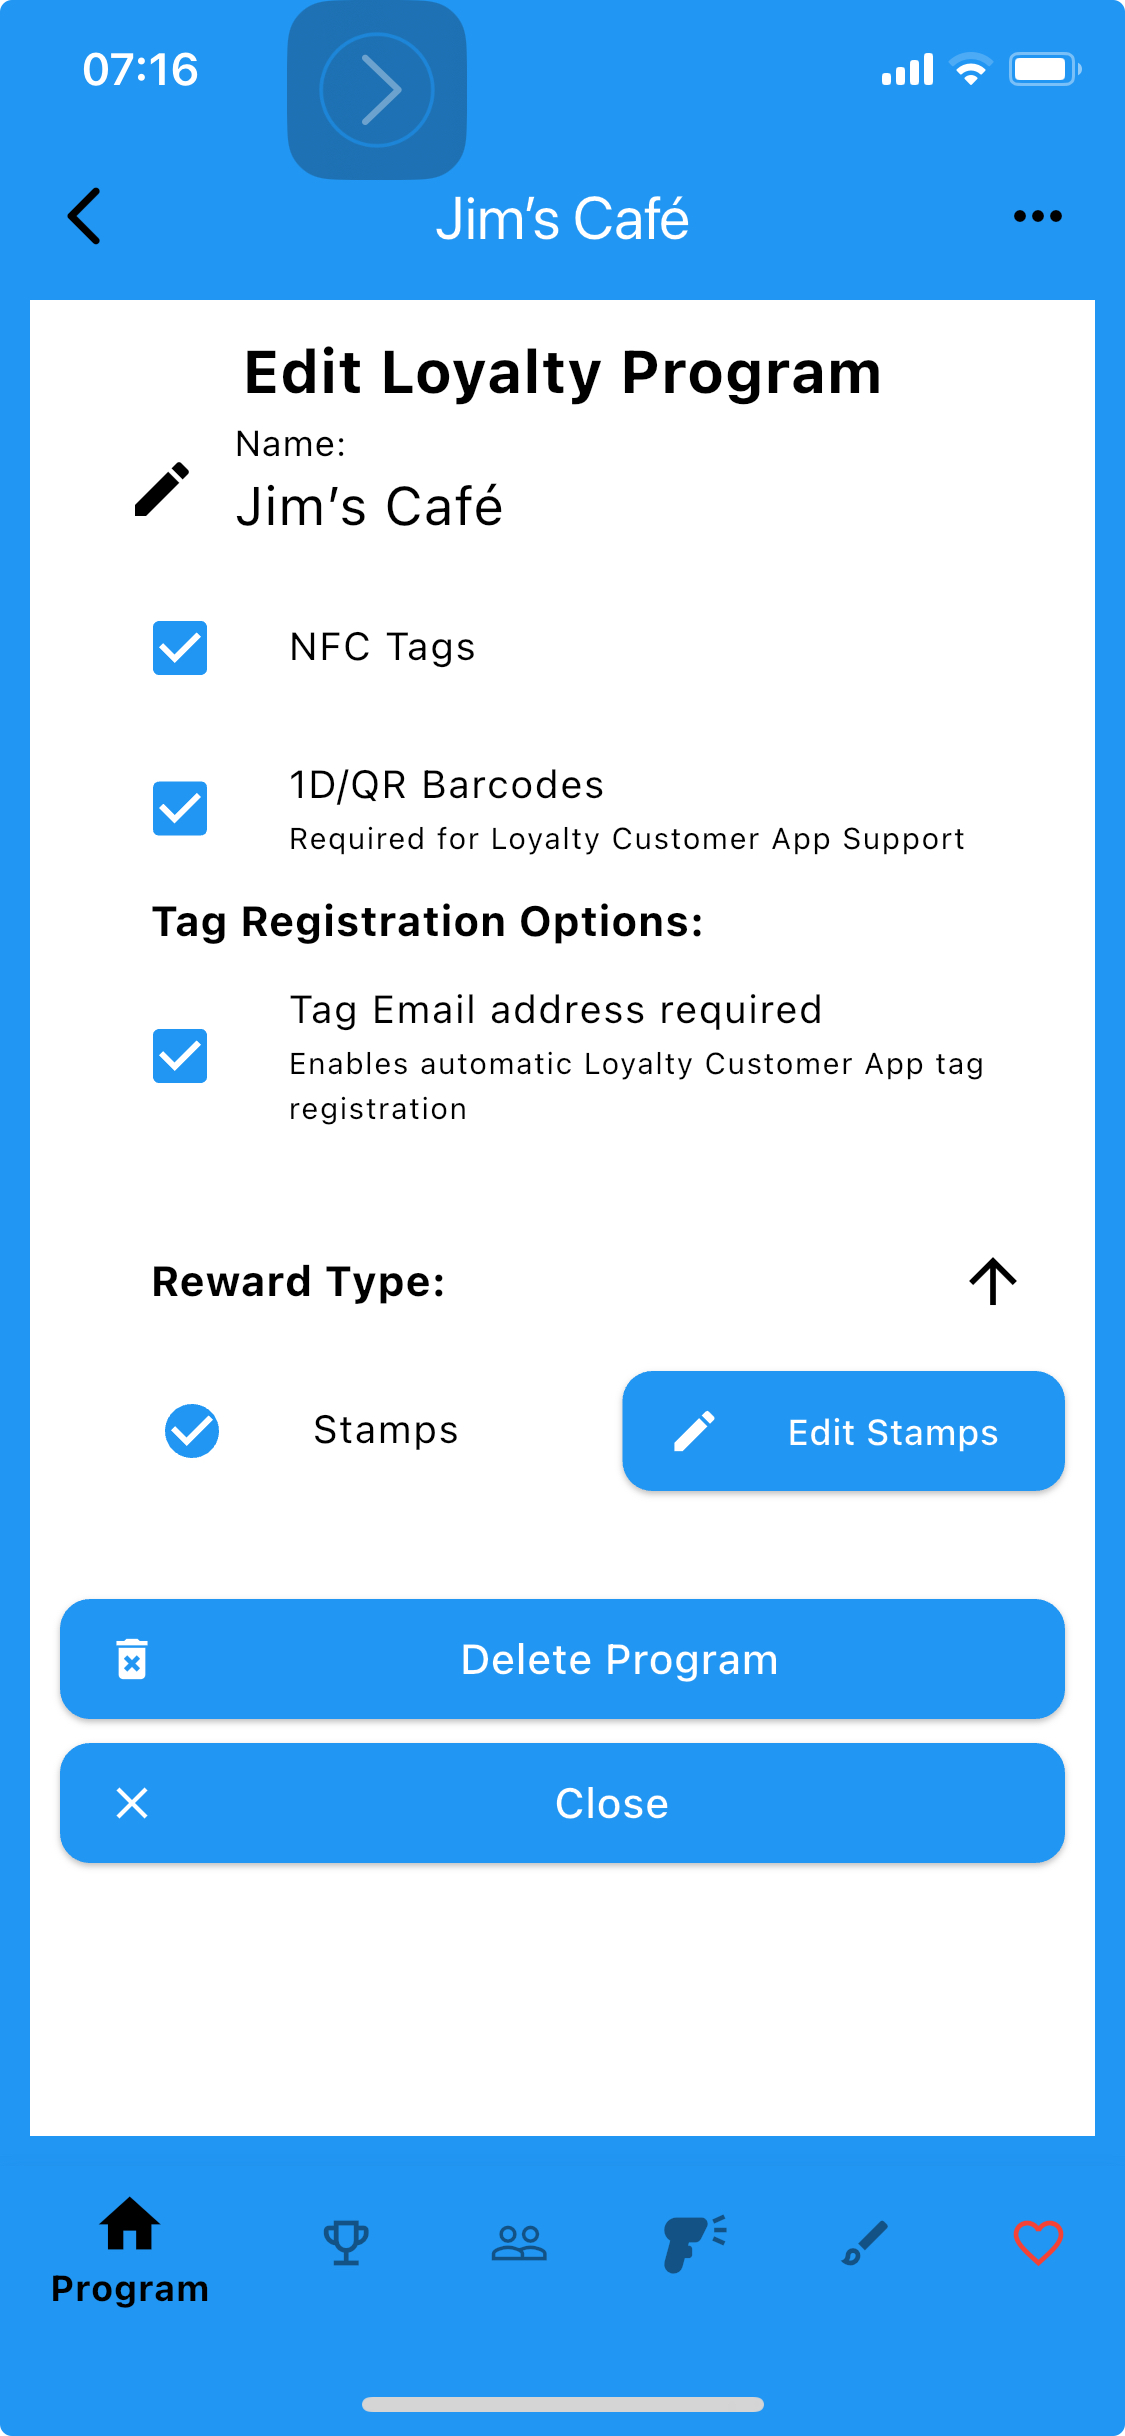
Edit Loyalty program
- Edit Program
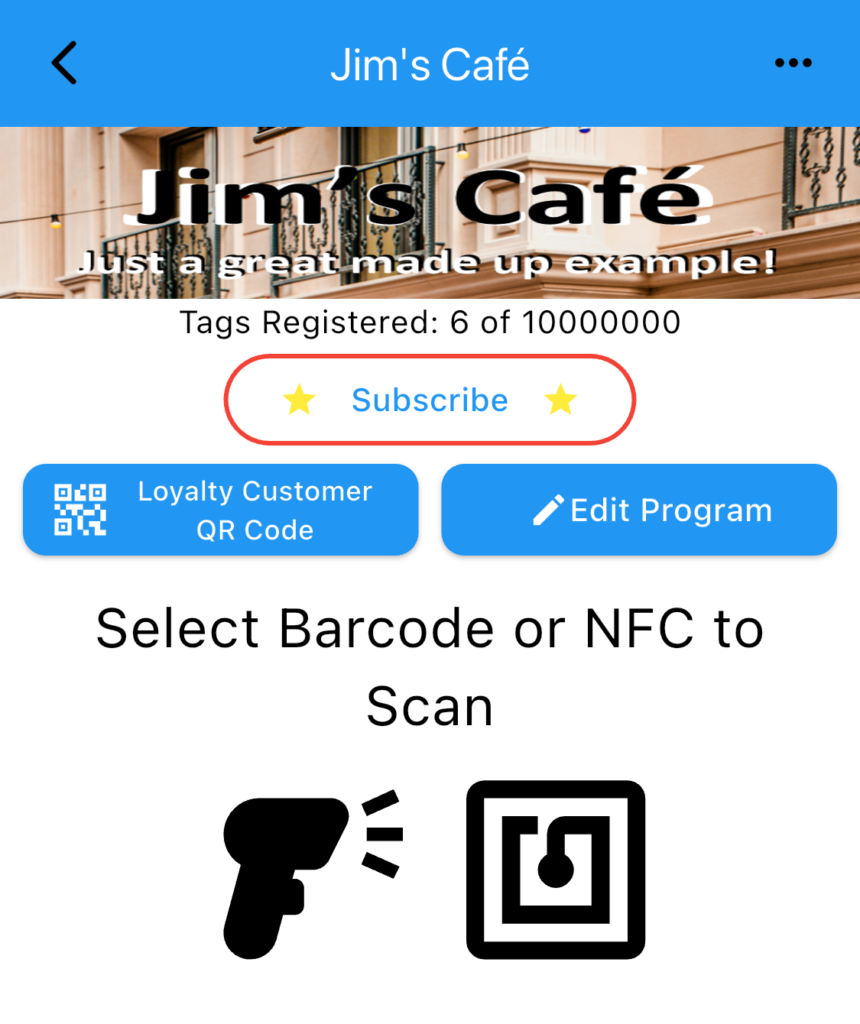
From the program home screen select ‘Edit Program’ button.
- Edit Program Home Page
From the edit program home page all the program features can be accessed.
Mani program functions are on the home page while each section can be selected from the tabs at the bottom of the screen
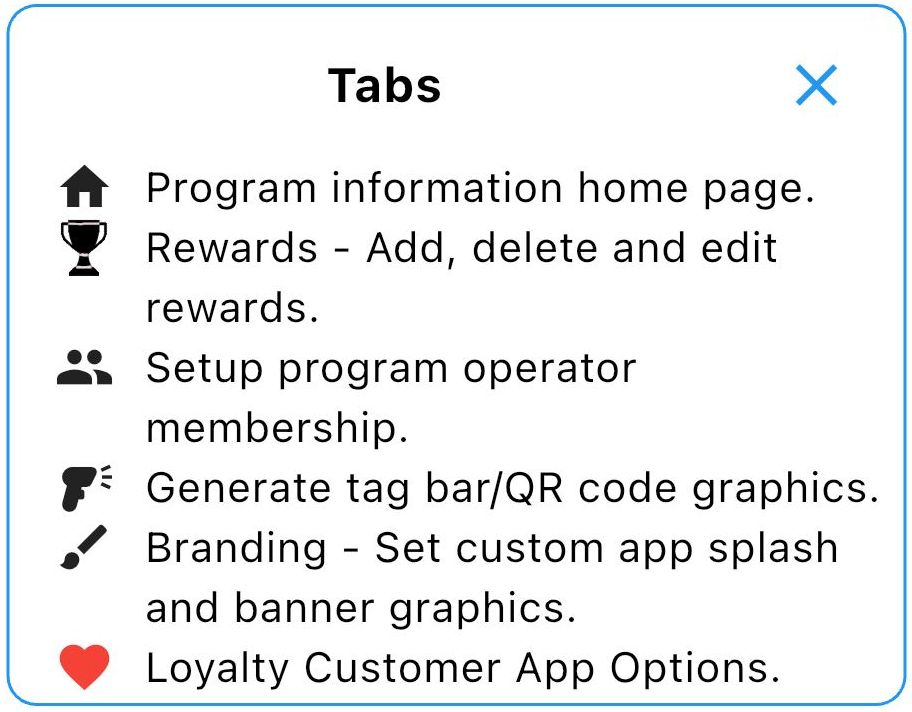
Use this page to change the program name, type of tags used, email address and stamps management.
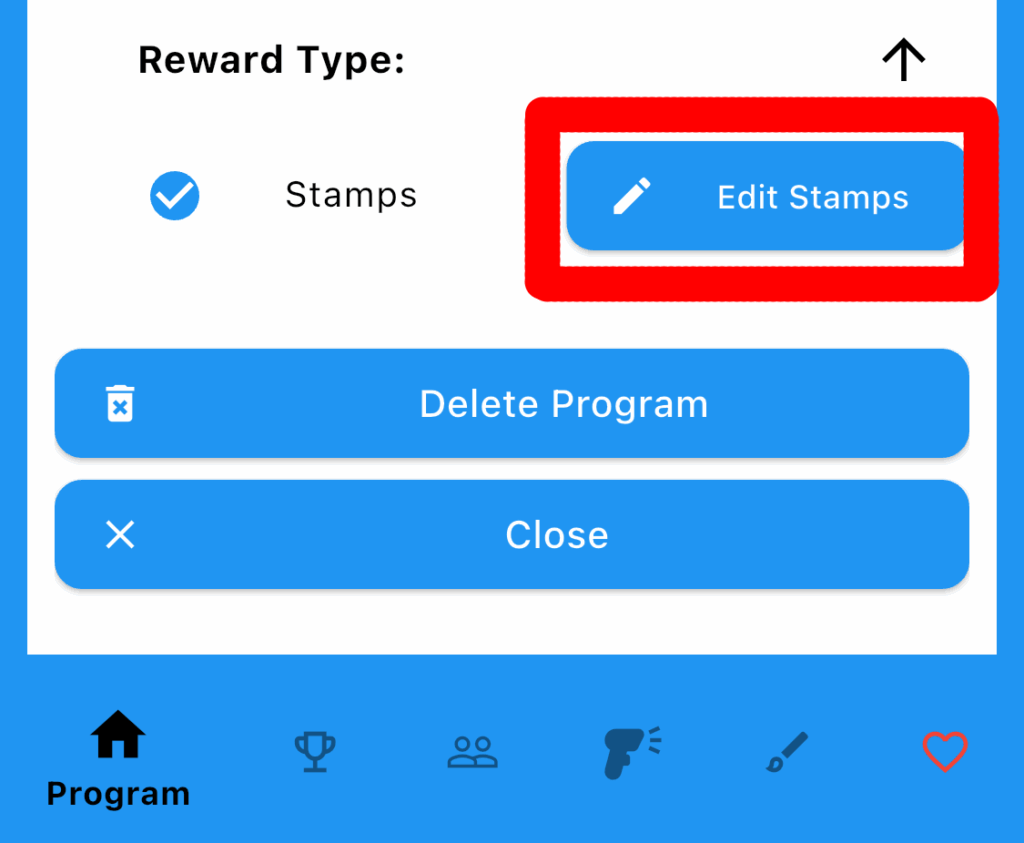
Stamps
- Select ‘Stamp Edit’ Button from program home page.
- Stamps Edit Page will Open.
Select Stamp to edit.
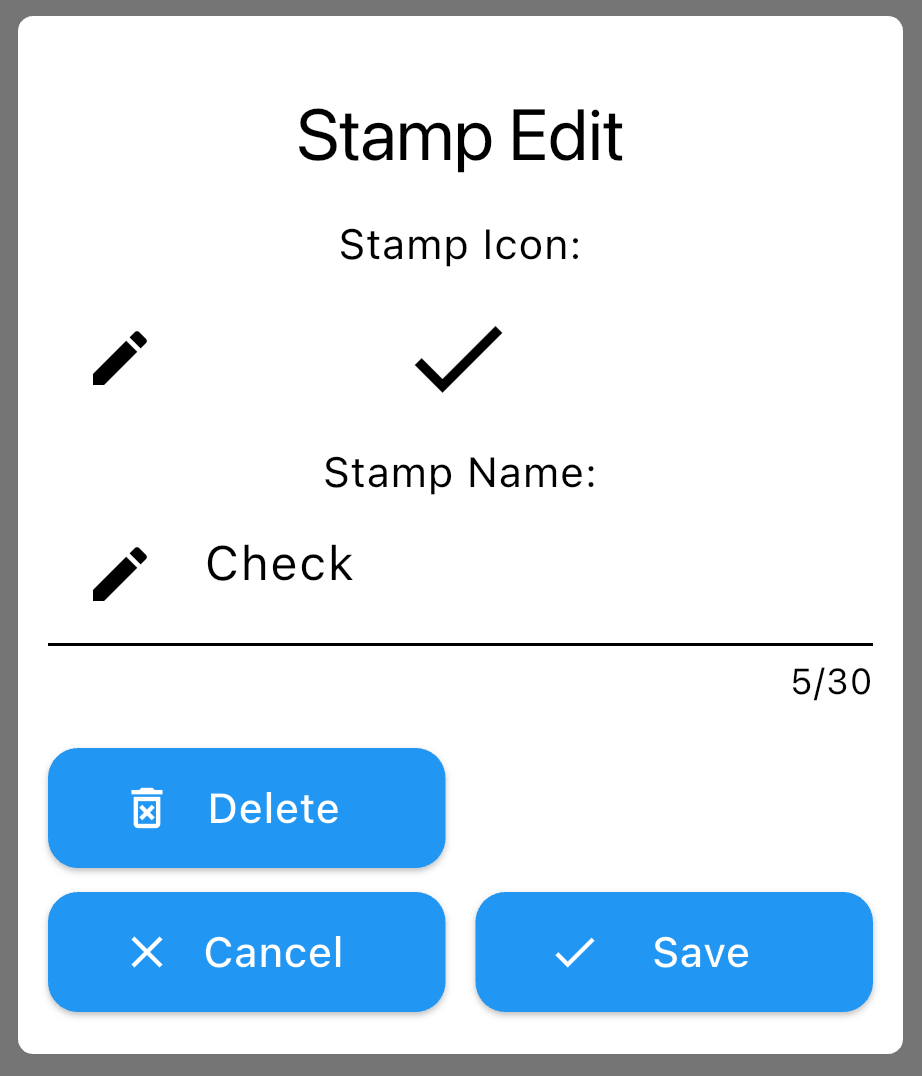
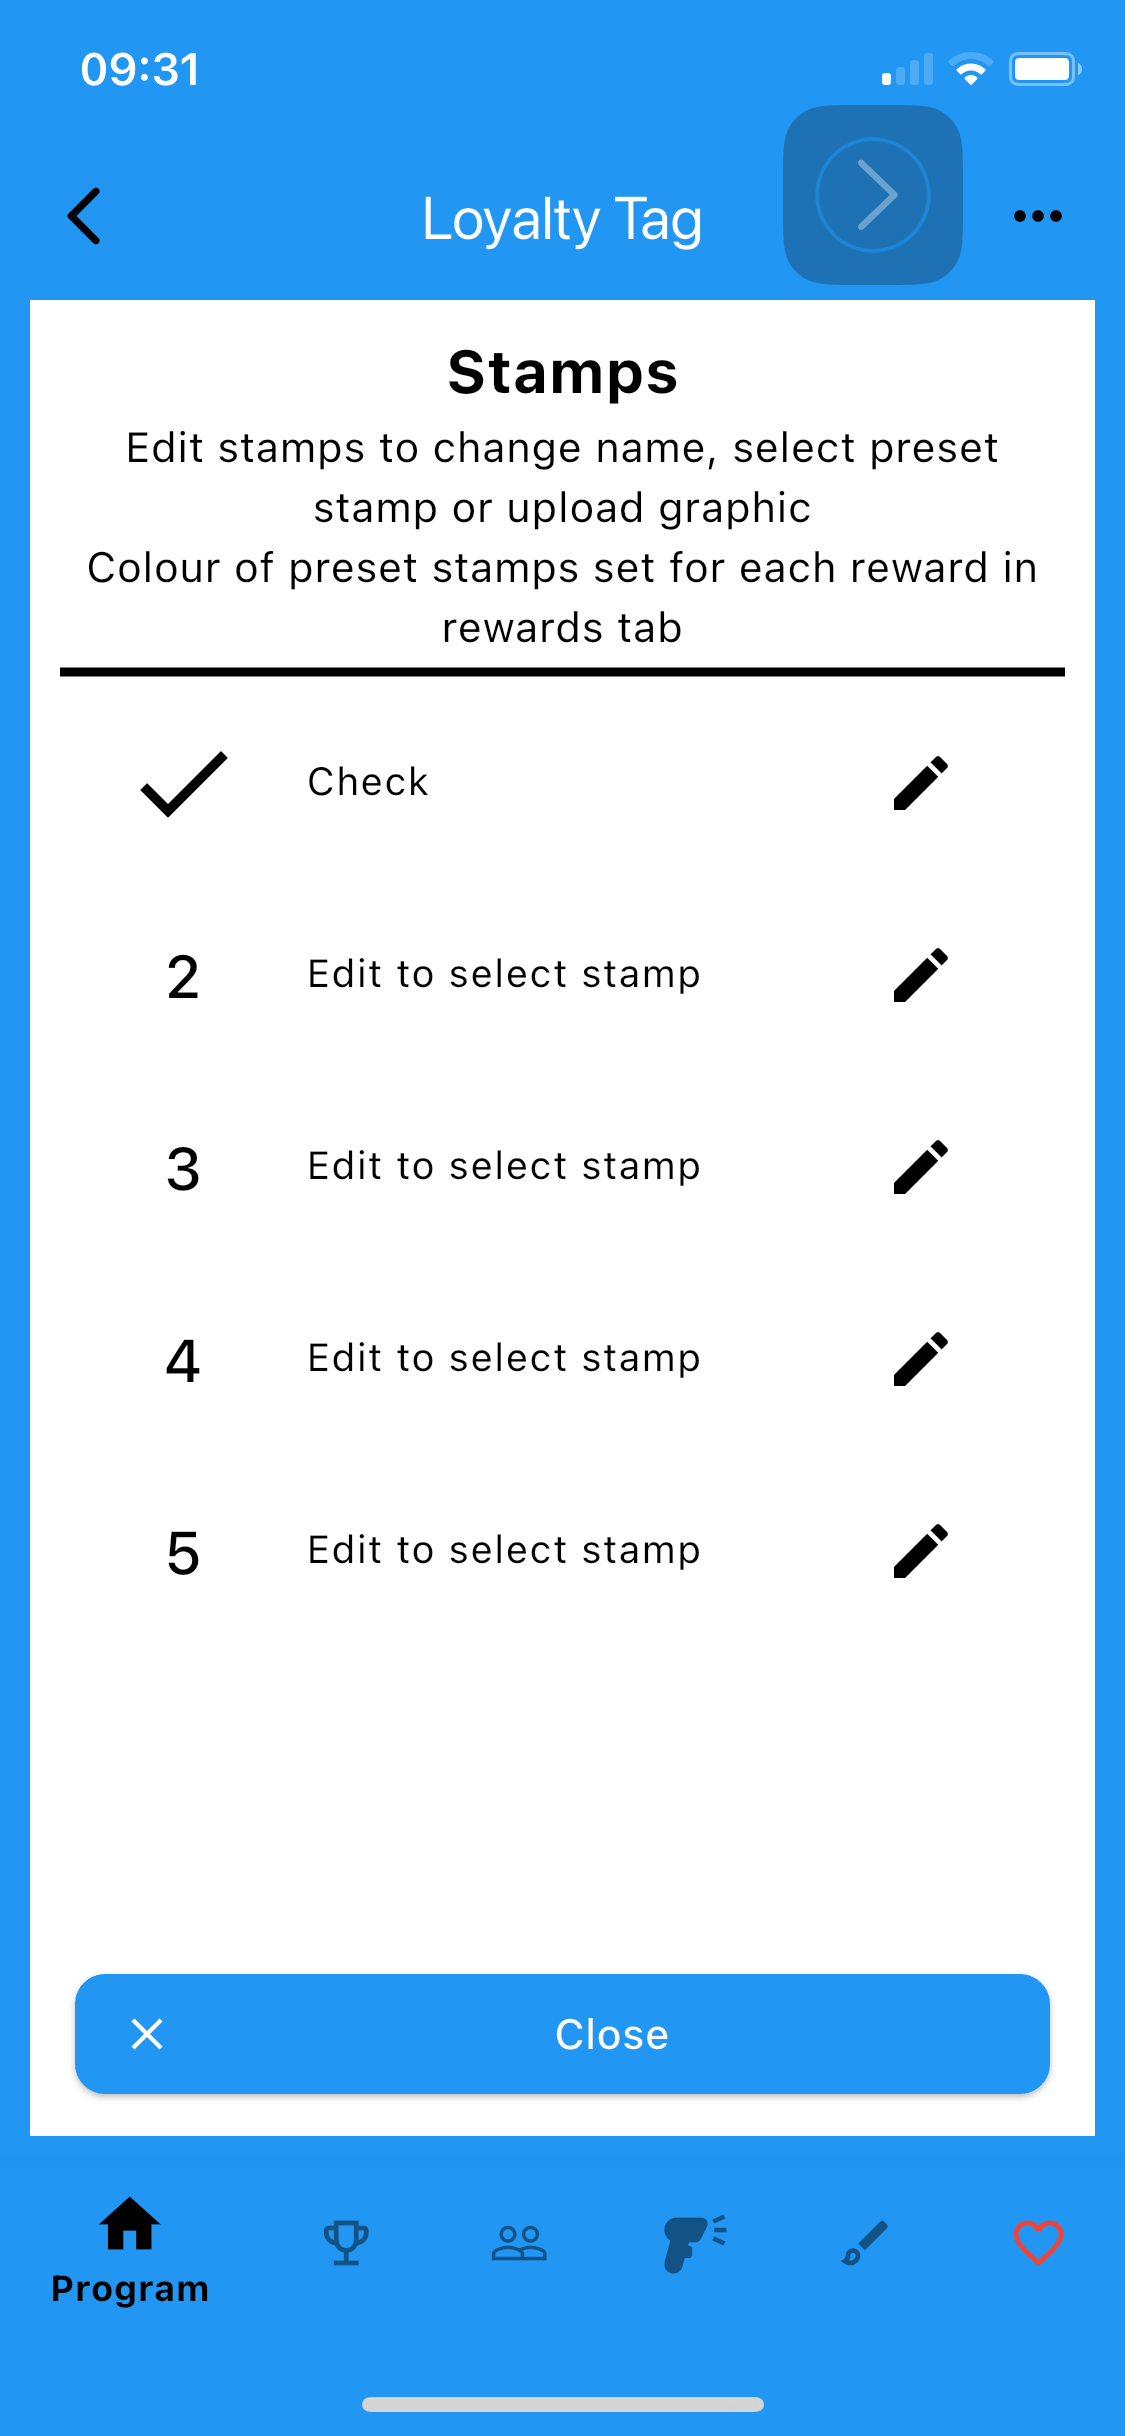
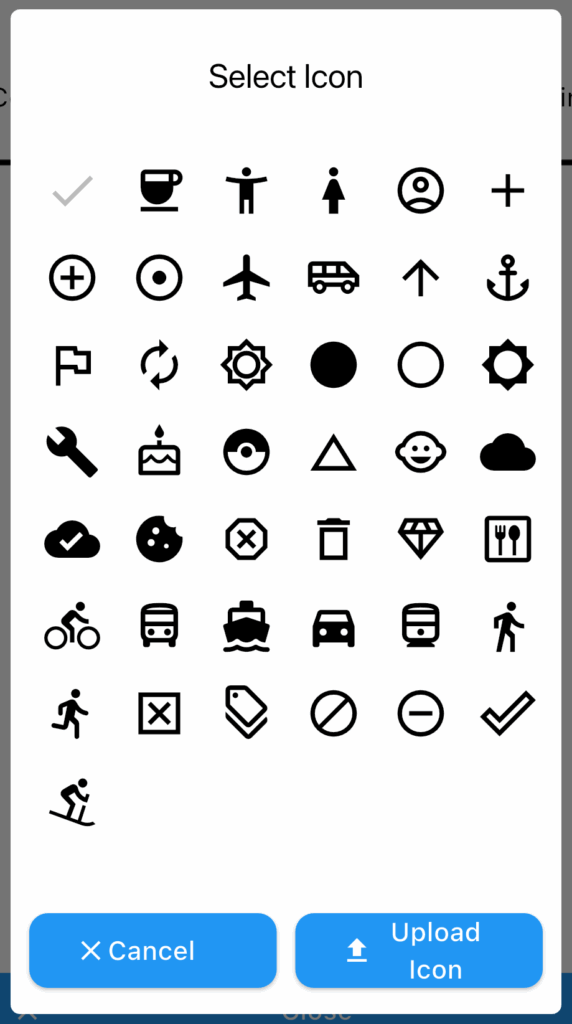
- To change a stamp, edit name or select the icon to change
- Select preset icon or upload custom icon.
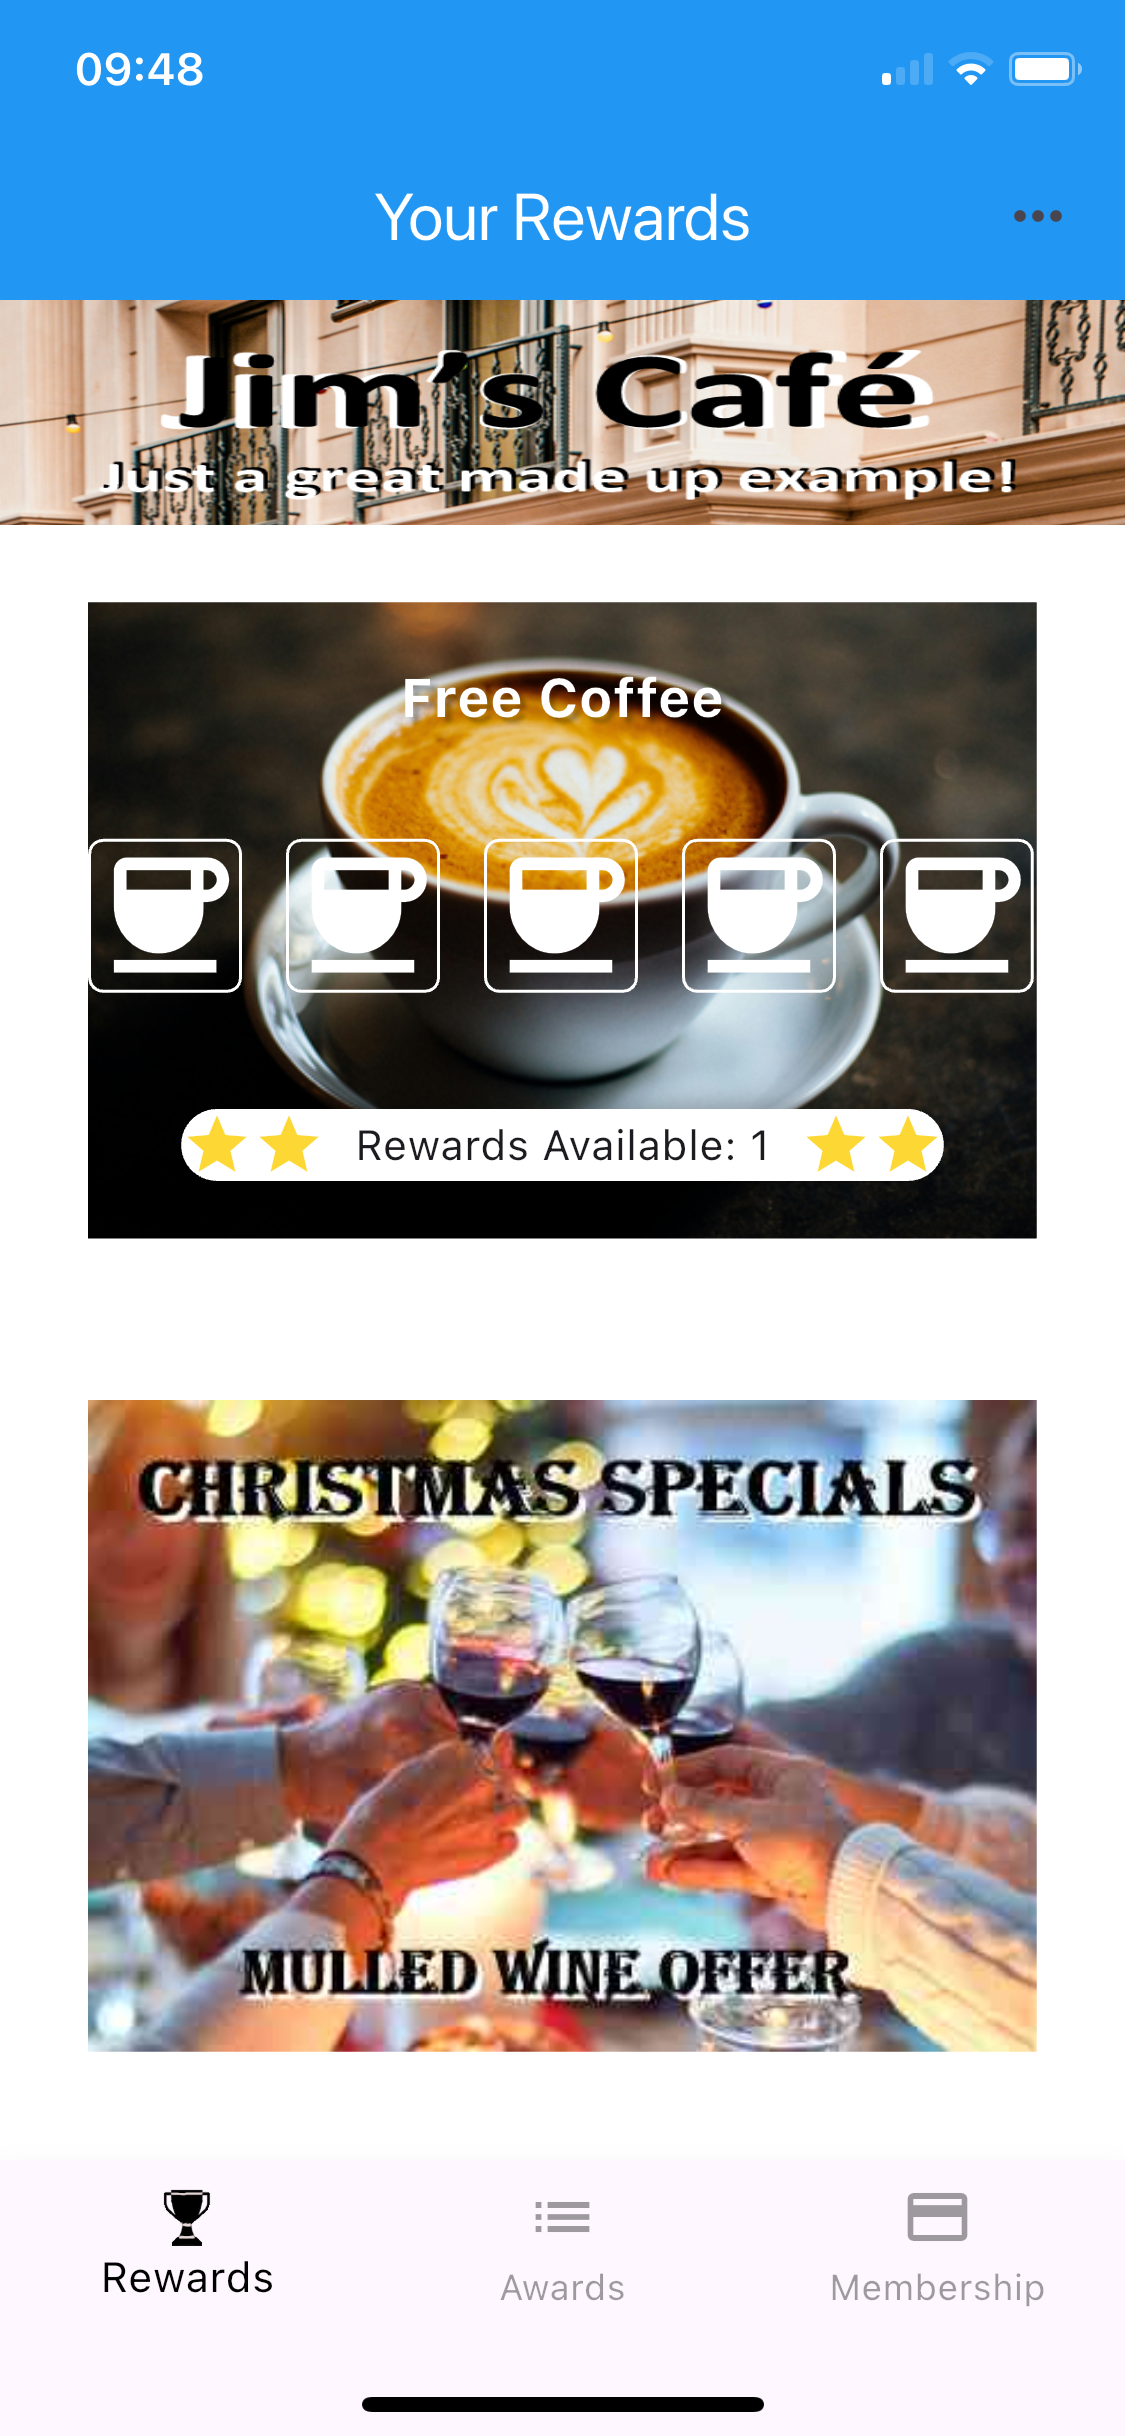
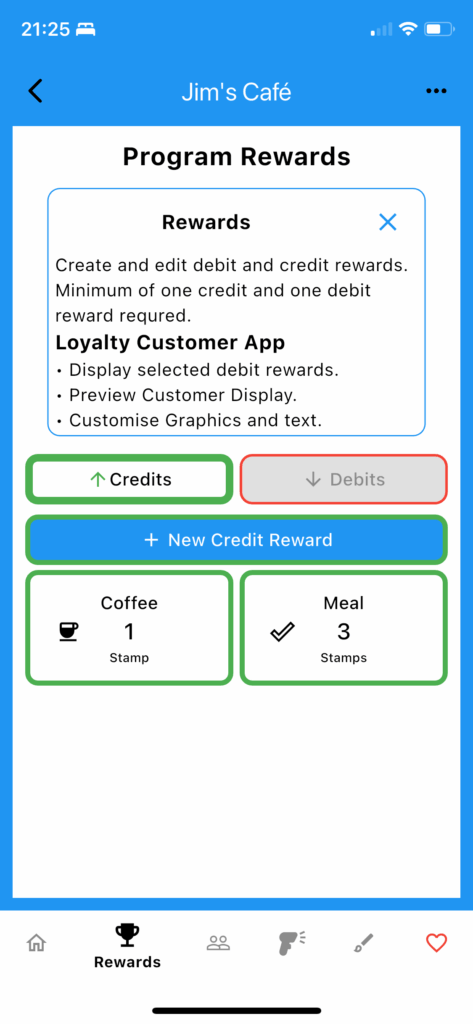
Rewards
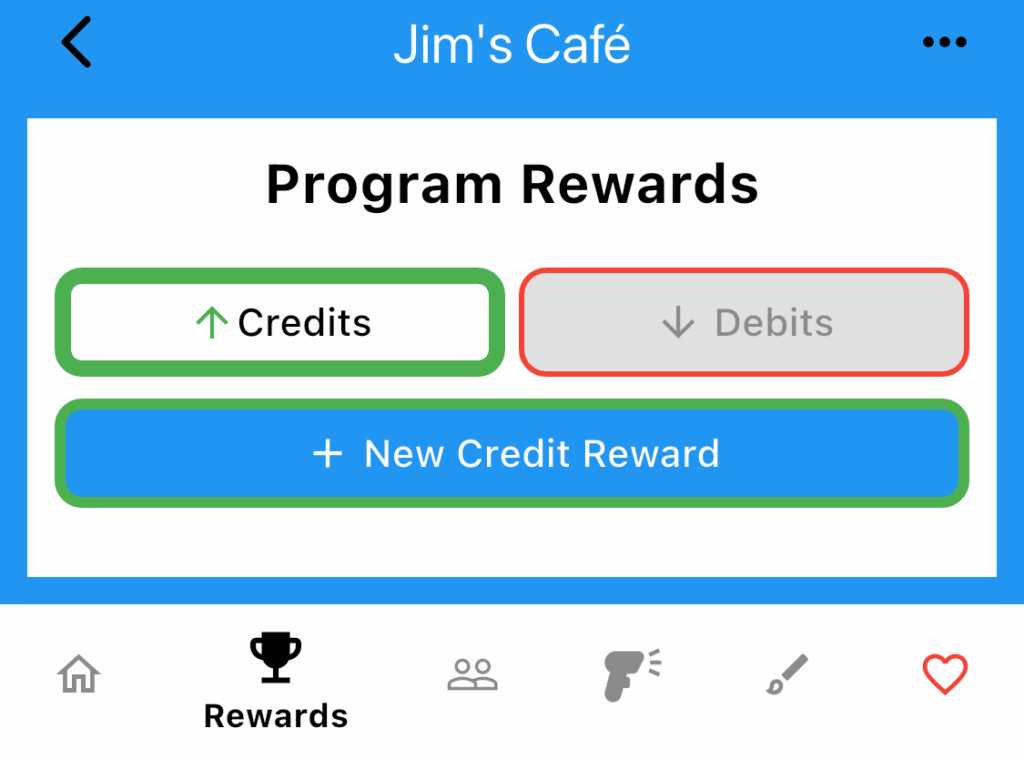
- Select the Reward Tab at the bottom of the screen. (graphic of shortened screen)
- Select Credit or Debit Rewards
- Tap New Reward Button or Select existing reward.
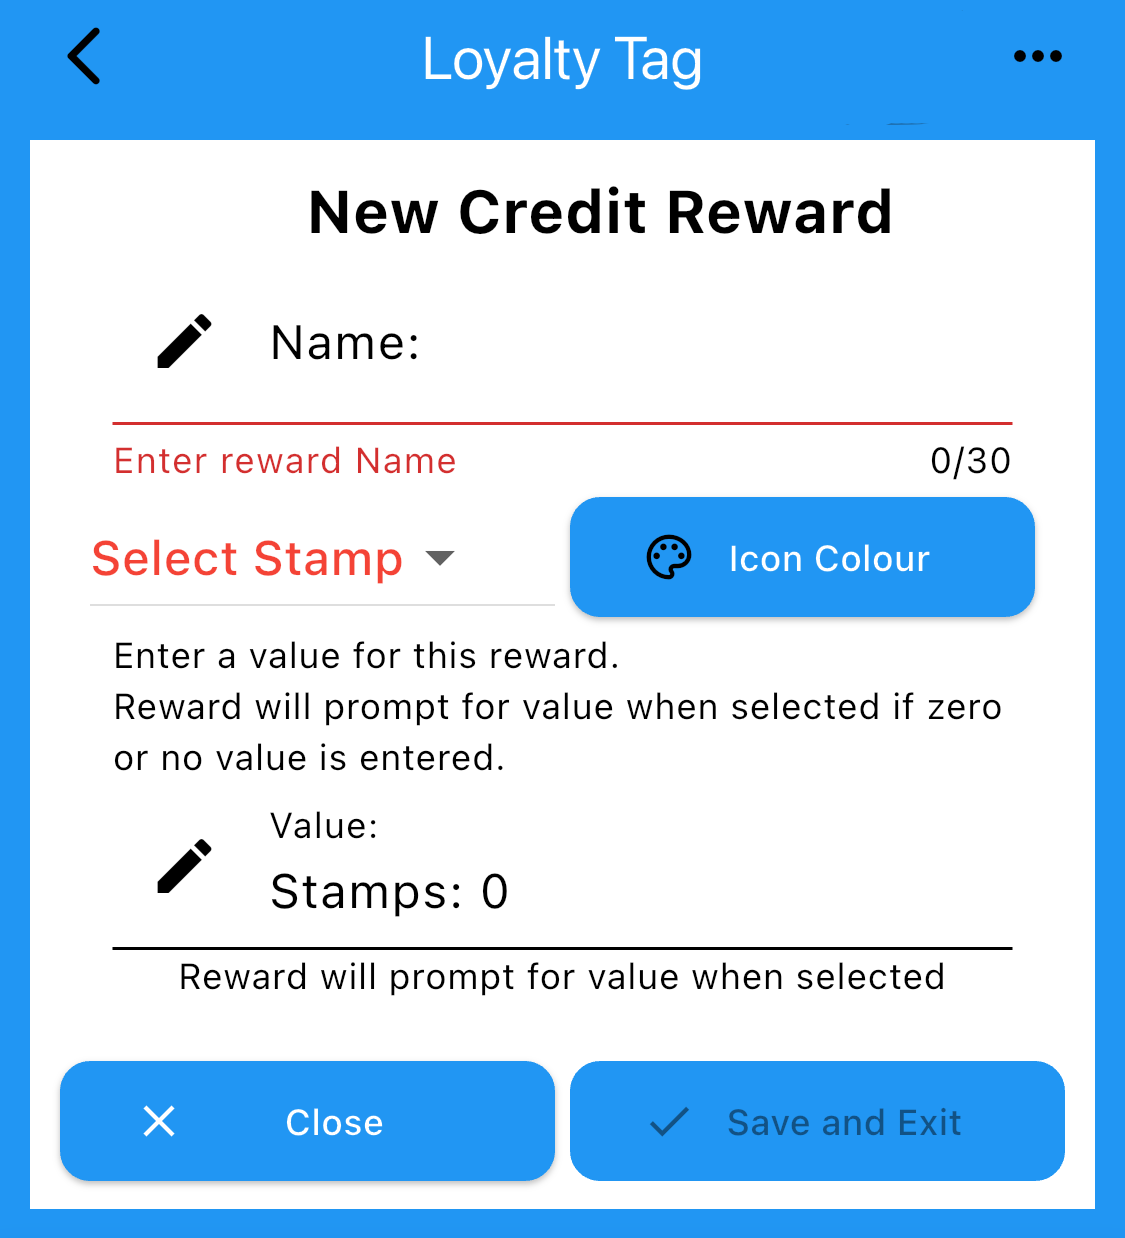
- New/Edit Credit Reward Screen
Enter a name and value.
If value is zero, a value prompt will show when selected
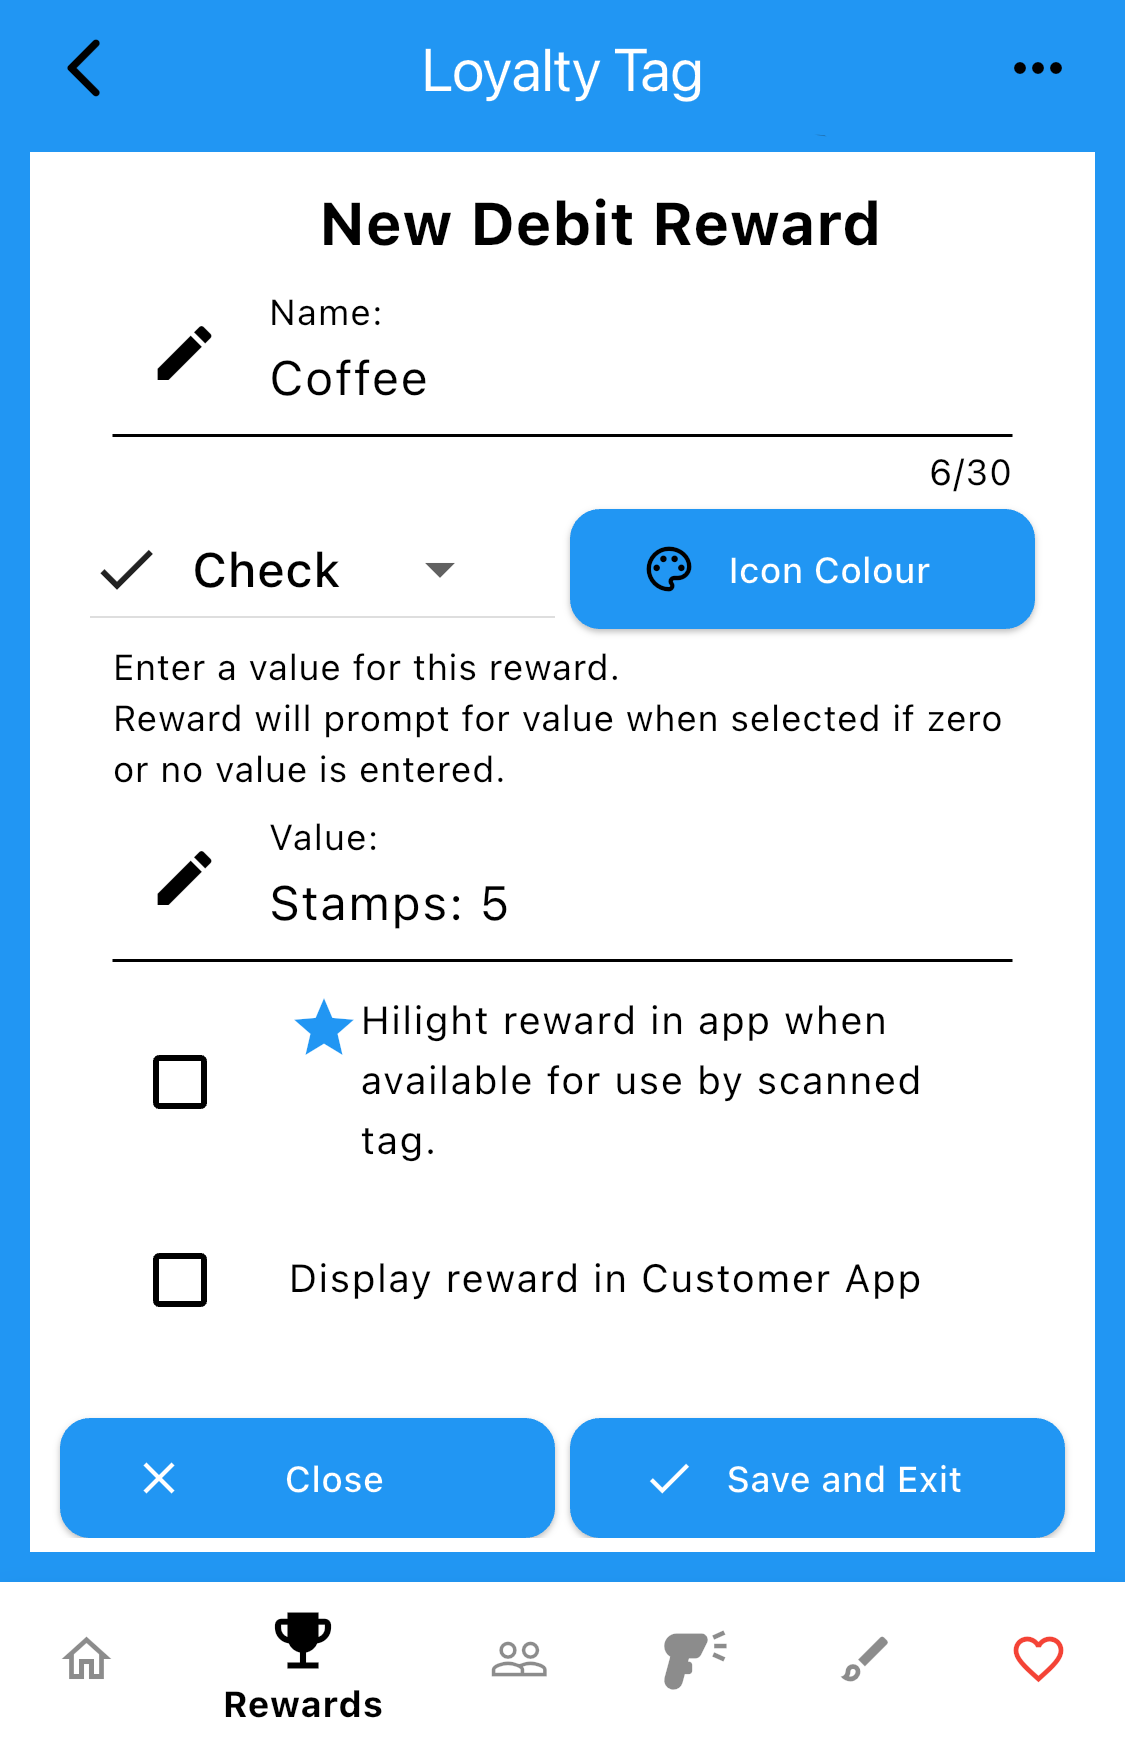
If Stamps are selected, A stamp must be chosen. - New/Edit Debit Reward Screen
Enter a name and value.
If value is zero, a value prompt will show when selected
If Stamps are selected, A stamp must be chosen.
Select Hi-light in loyalty Tag when available if required
To display in Customer Loyalty App a value must be entered.
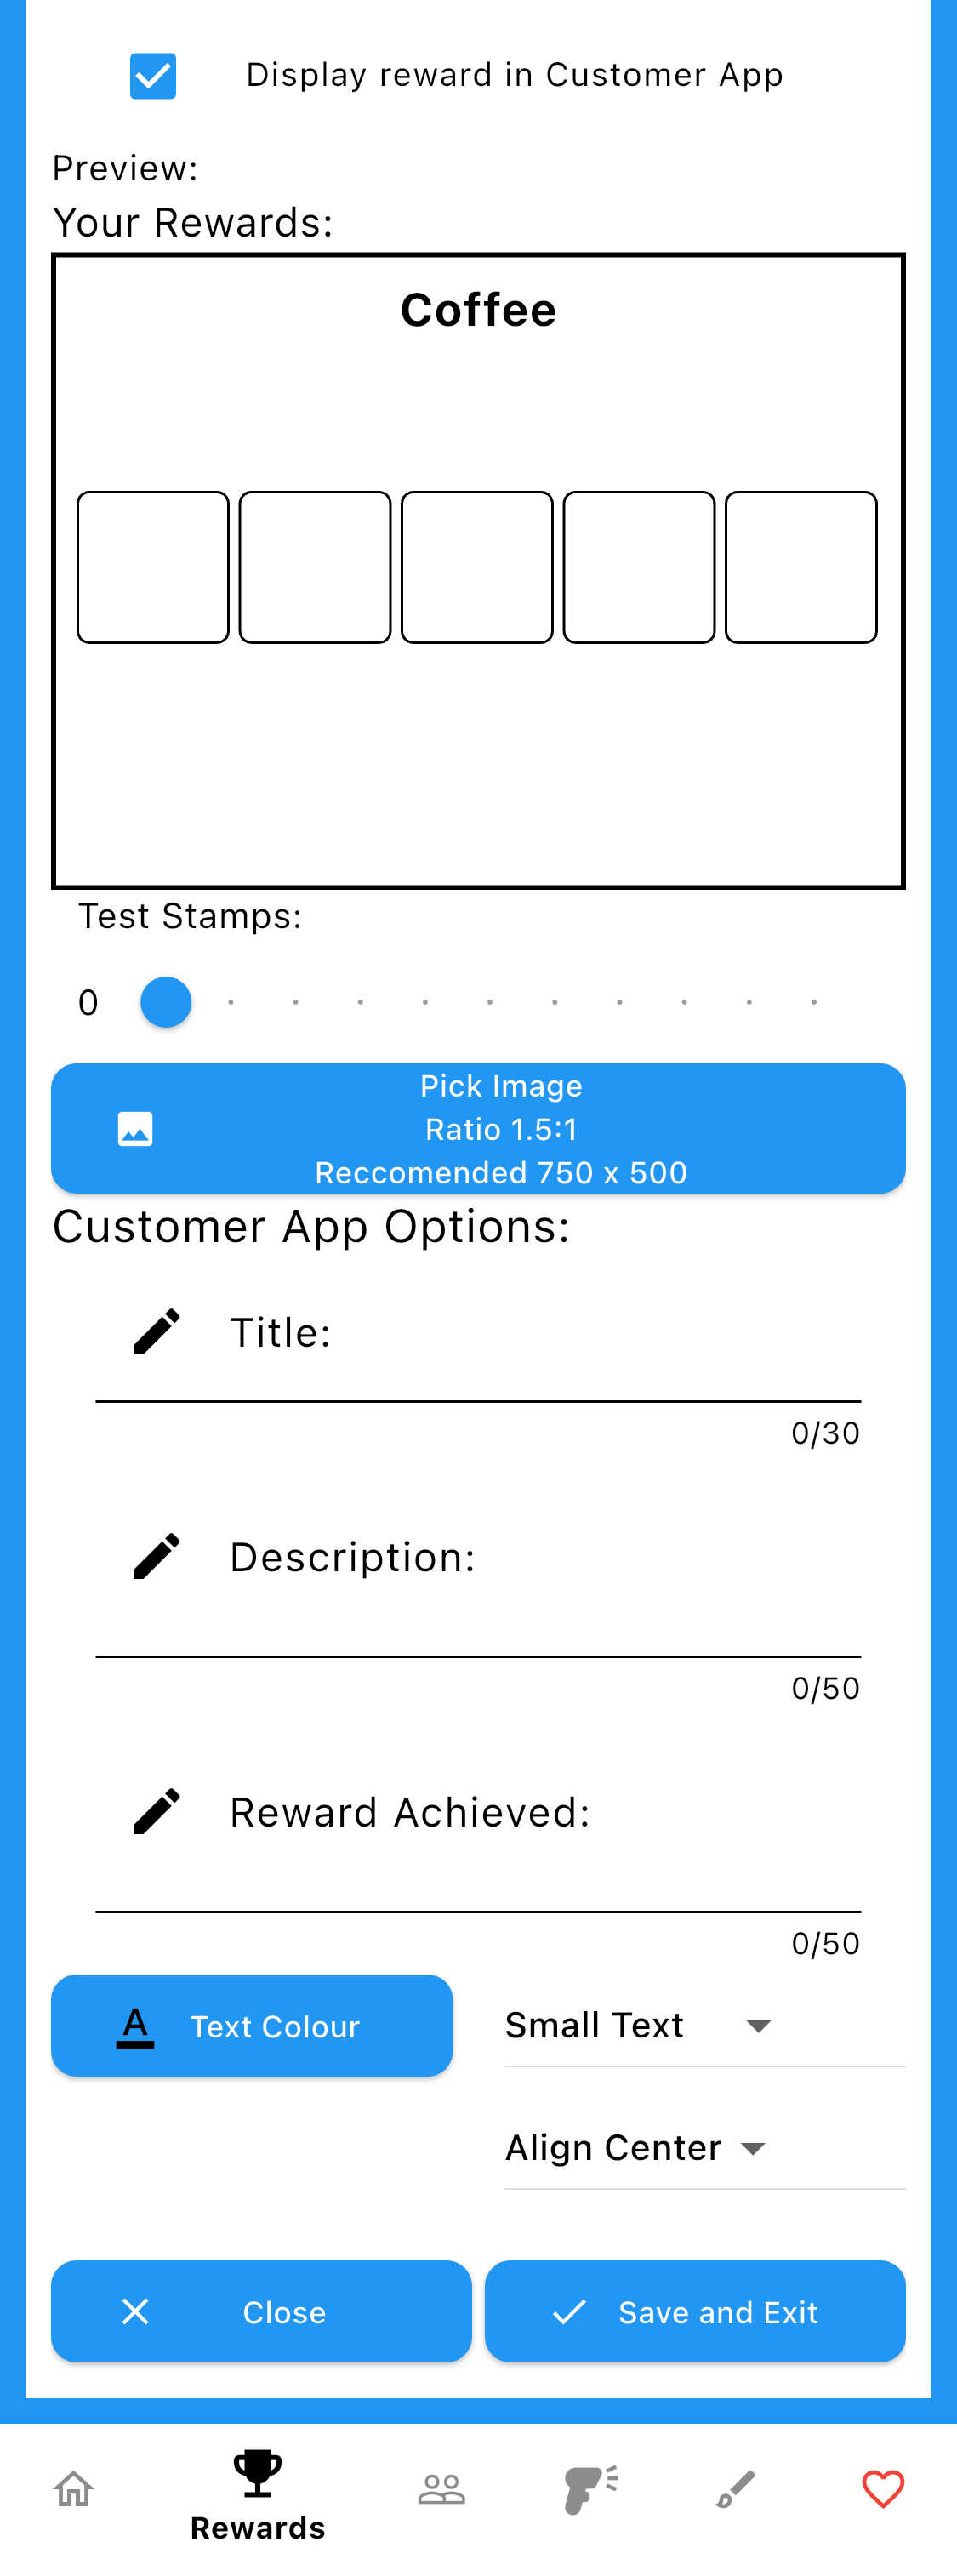
Enter a value and select to display in Customer Loyalty App if required. Additional options will appear when selected. - Customer Loyalty App Options
Options only display within Loyalty Customer App. Your Reward: shows a preview of the reward as it will appear with Loyalty Customer App.
Optionally set a background image and text options.
Select text colour, size and alignment to show reward as required. - Save and Exit when finished
Saved rewards are shown in the Rewards Tab page.
To edit a reward select it from the Rewards Tab page.
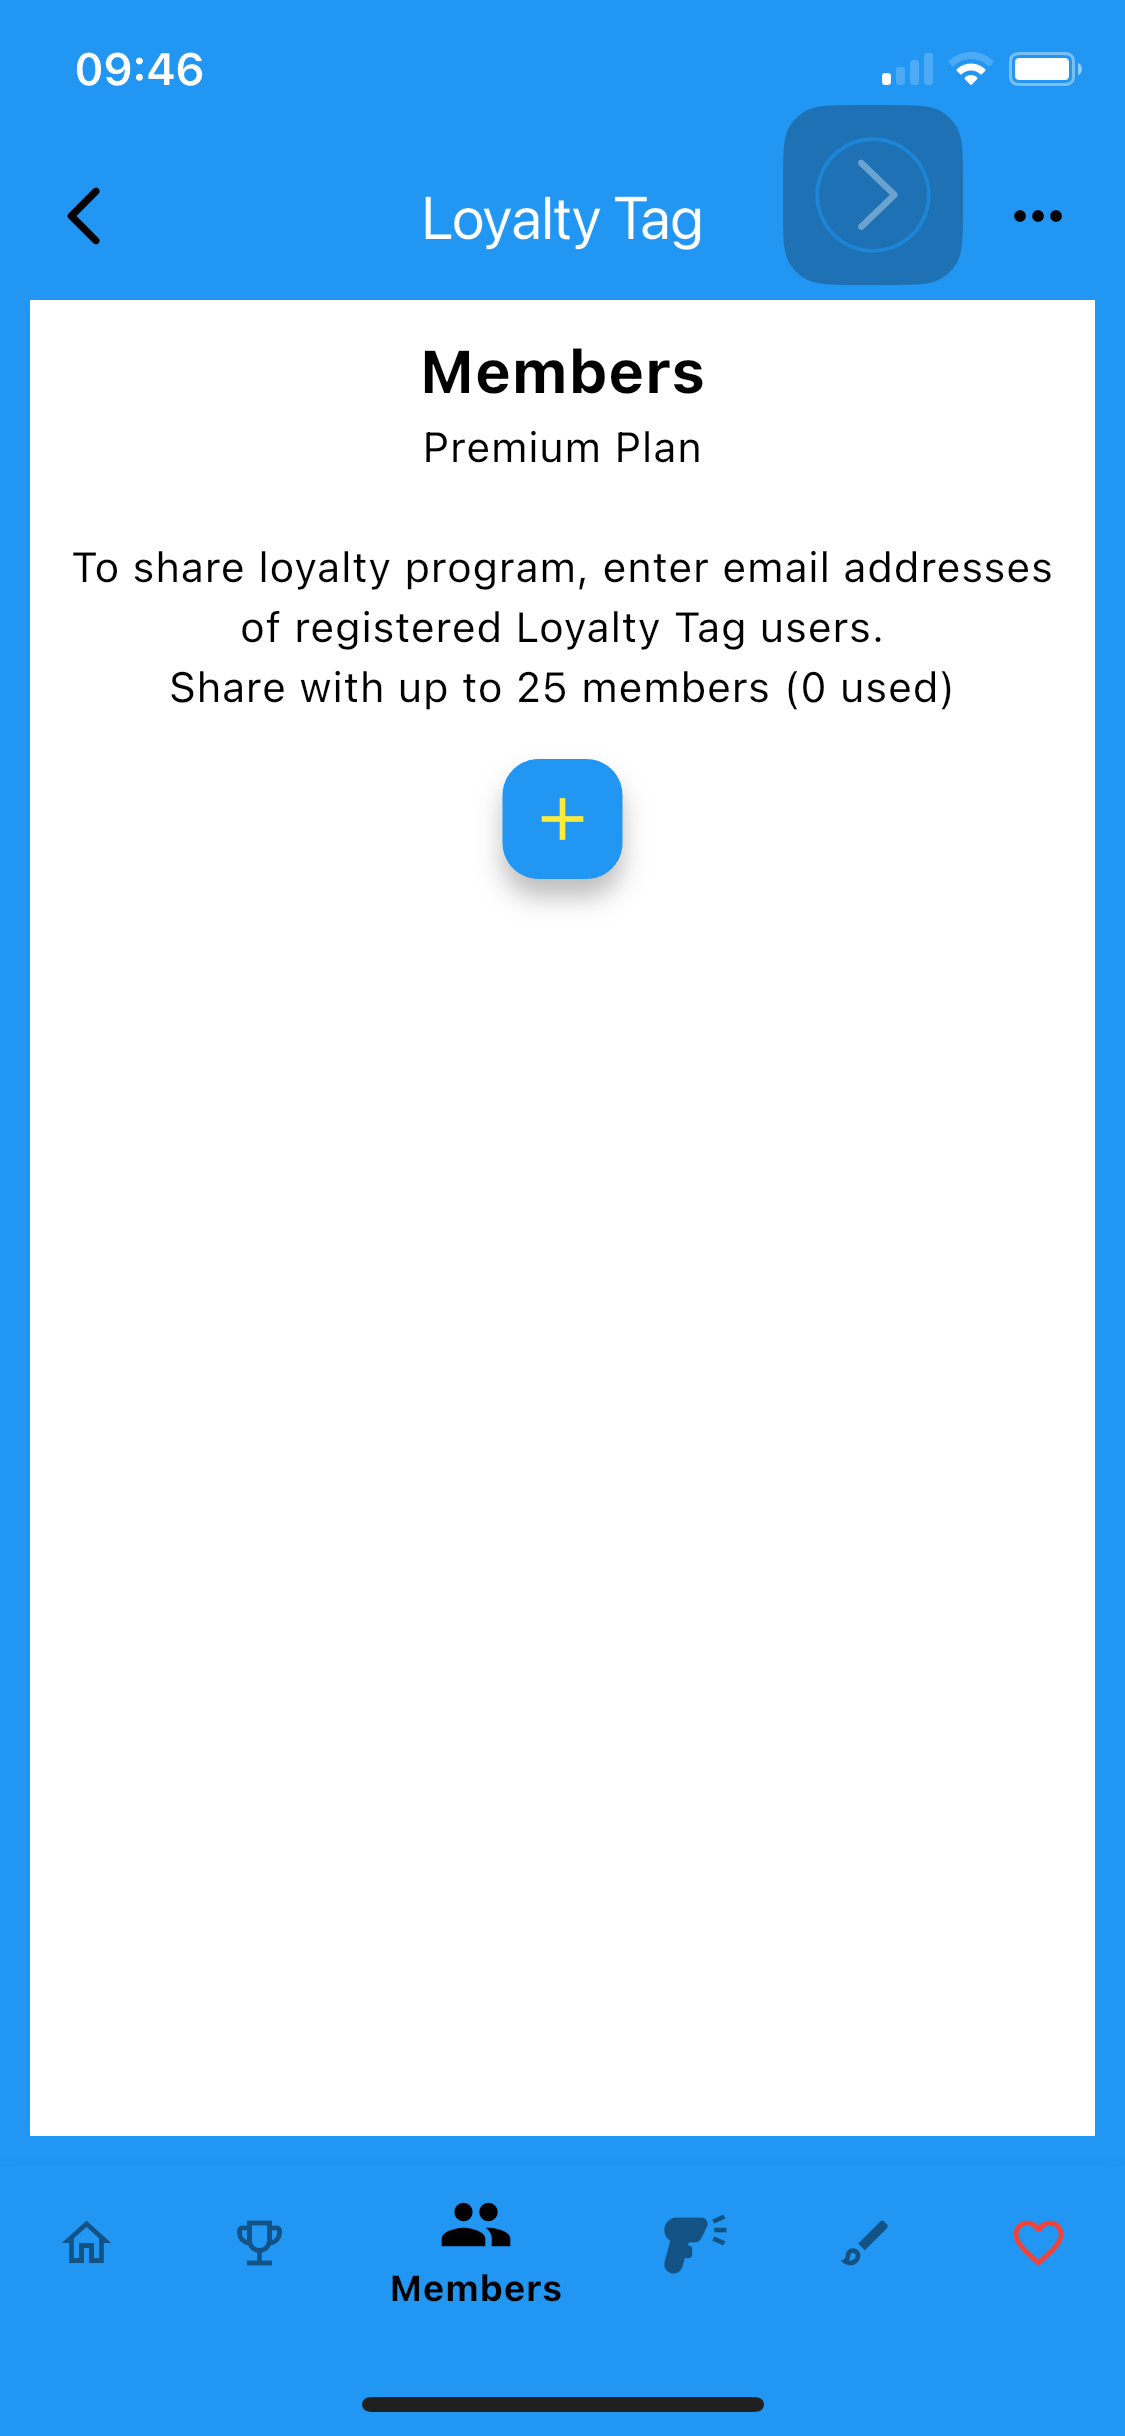
MemberS
- Select the Members tab at the bottom of the screen
Membership allows you to share your Loyalty Program with other Loyalty Tag users.
Members will be able to operate but will not be able to edit programs they are members of. - Select add button to add a Loyalty Tag members email address to the list.
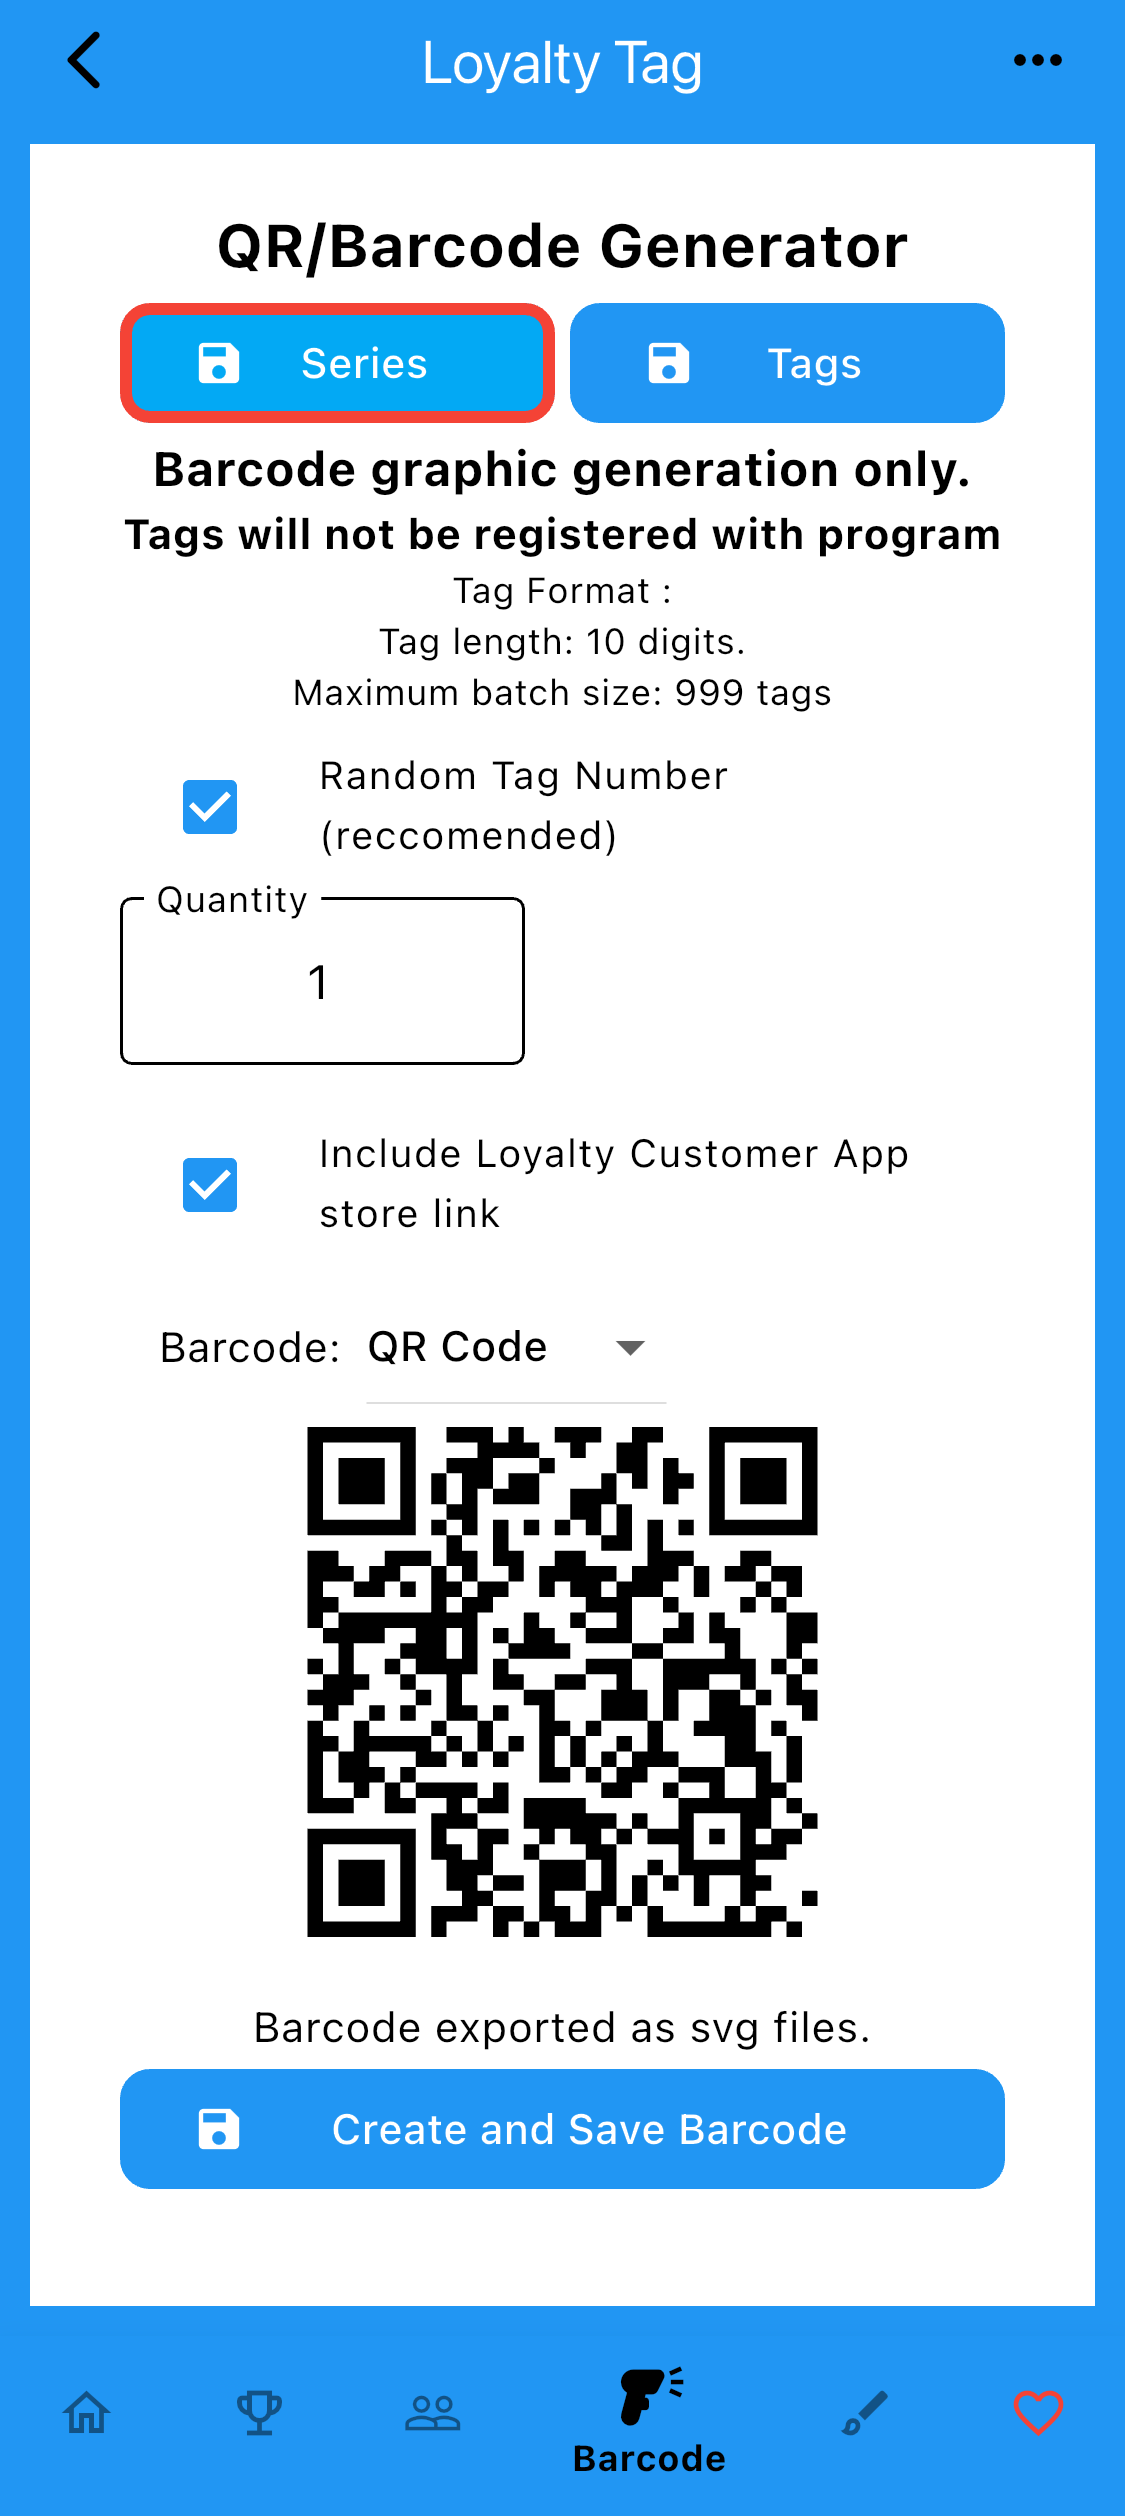
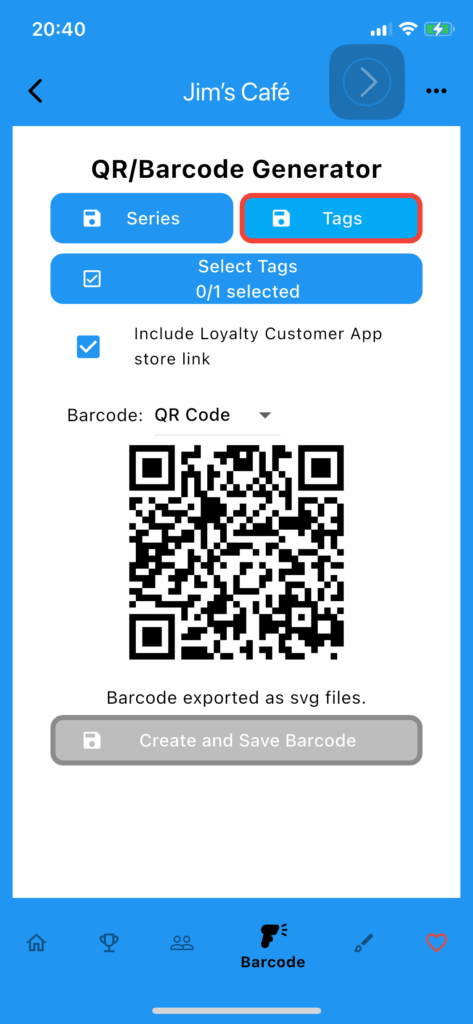
Barcode Creation
Barcode Tab creates barcode graphics for Loyalty Program Tags.
- Tag Series
Select random or a series of tag numbers to create. Random numbers are recommend.
Select barcode type. QR or Code 128 are supported.
Select create and Save Barcode to create a series of tag graphics. Tag graphics are saved to a local directory on the device. - Tags
To create a specific tag or multiple tag graphics select Tag.
Tap the ‘Select Tags’ button to select tags registered with your Loyalty Tag program.
Select barcode type. QR or Code 128 are supported.
Select create and Save Barcode to create a series of tag graphics. Tag graphics are saved to a local directory on the device.
Tag formats:
Although the generator only creates 2 tag types, the following tags can be read:
QR Code
code 128
code 39
code 93
codabar
dataMatrix
ean13
ean8
ift
upcA
upcE
pdf417
aztec
Test printed barcode for reliability before use as performance may vary with printer.
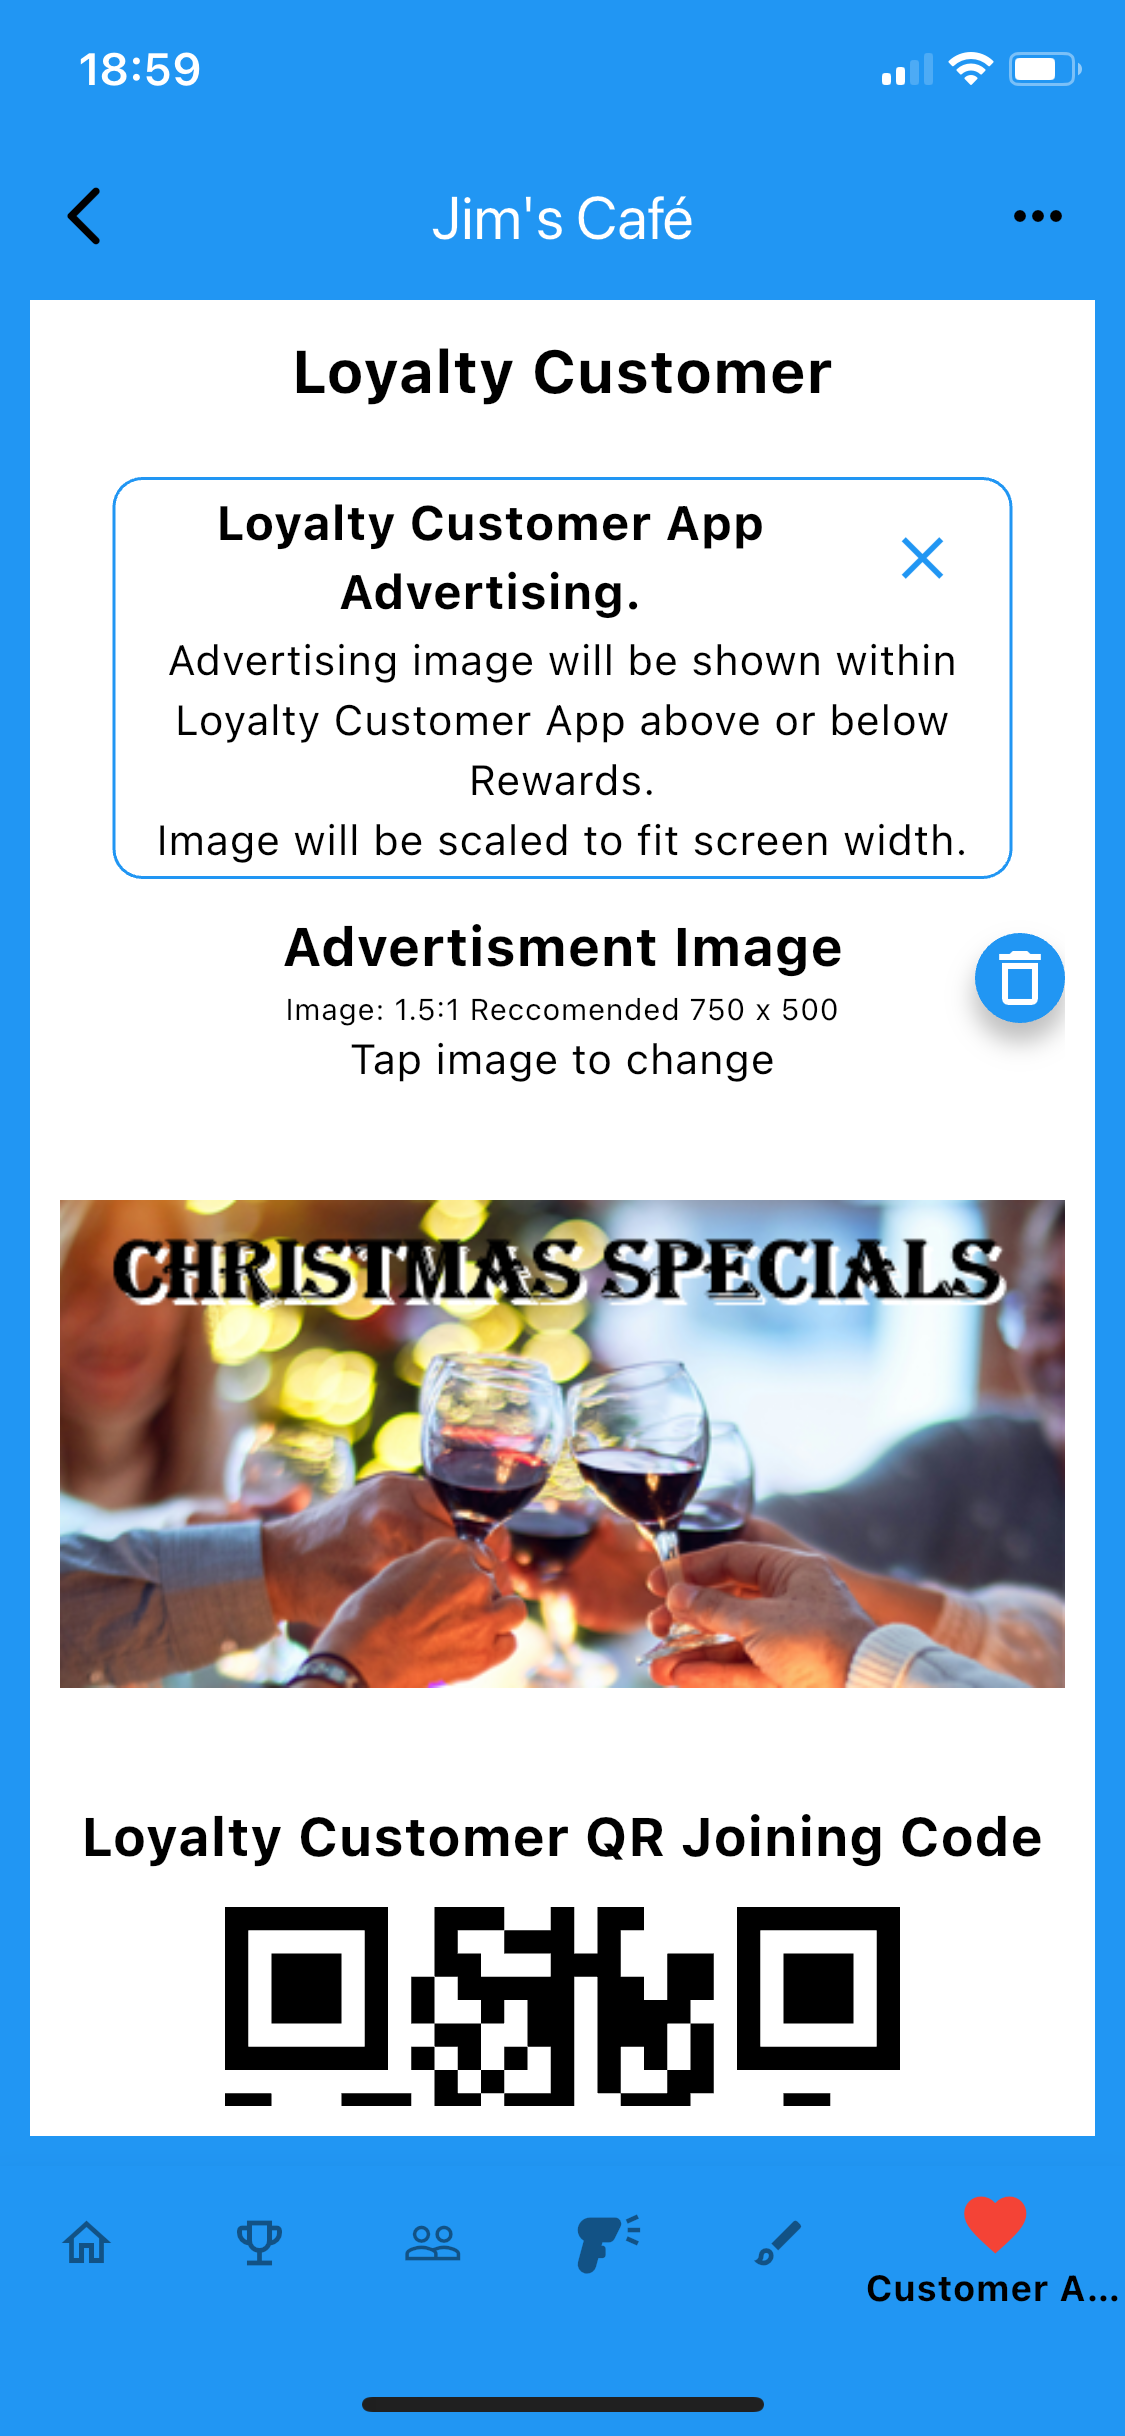
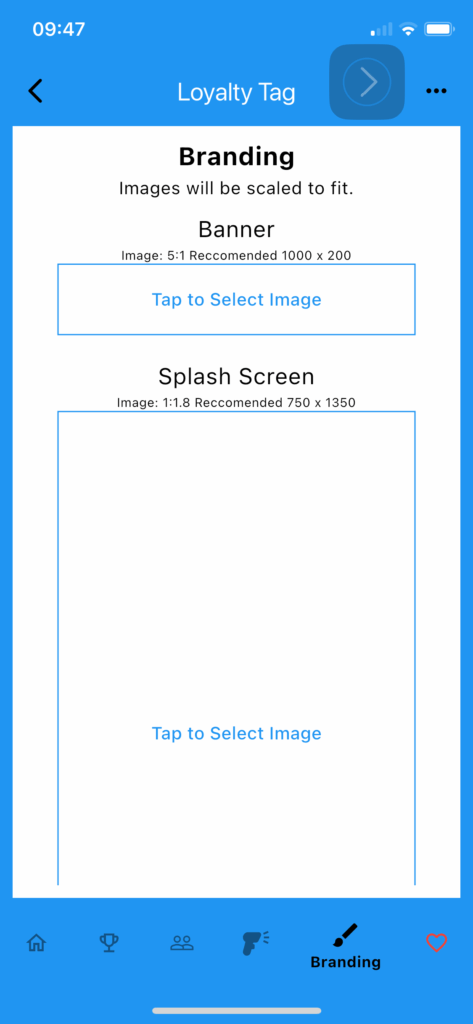
Branding
- Select the Branding tag at the bottom of the screen
- To upload a banner tap the banner area and select an image from your device.
Image should be approximately 1000 x 500 pixels (2:1 ratio) for correct display. - To upload a Splash tap the splash area and select an image from your device.
Image should be approximately 750 x 1350 pixels (1:1.8 ratio) for correct display. - Loyalty Tag and Loyalty Customer apps will be updated when image is selected,
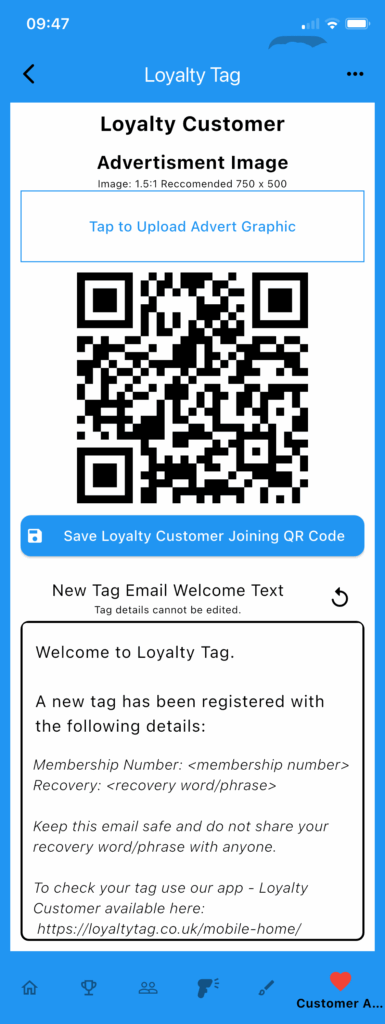
Loyalty Customer App
- Select the Loyalty Customer tab at the bottom of the screen
- Program joining QR code is generated and image file can be saved to device by selecting save button.
- Loyalty Tag can sends a welcome email to new tag holders when tags are registered with an email address.
Edit the welcome email text as required.
Tag details (shown in italic) is fixed and cannot be changed.
Advertising
- To upload an advert tap the advert area and select an image from your device.
Image should be approximately 750 x 500 pixels (1.5:1 ratio) for correct display.
Loyalty Customer will be updated immediately